How to use Deskreen

THREE EASY STEPS

1
STEP ONE: CONNECT
When you have your computer with Deskreen running - Scan QR code with a tablet or phone, or type in web browser address bar manually what you see in blue button under the QR code. That will open a page on your tablet with connection status.
Step 1: QR Code connection

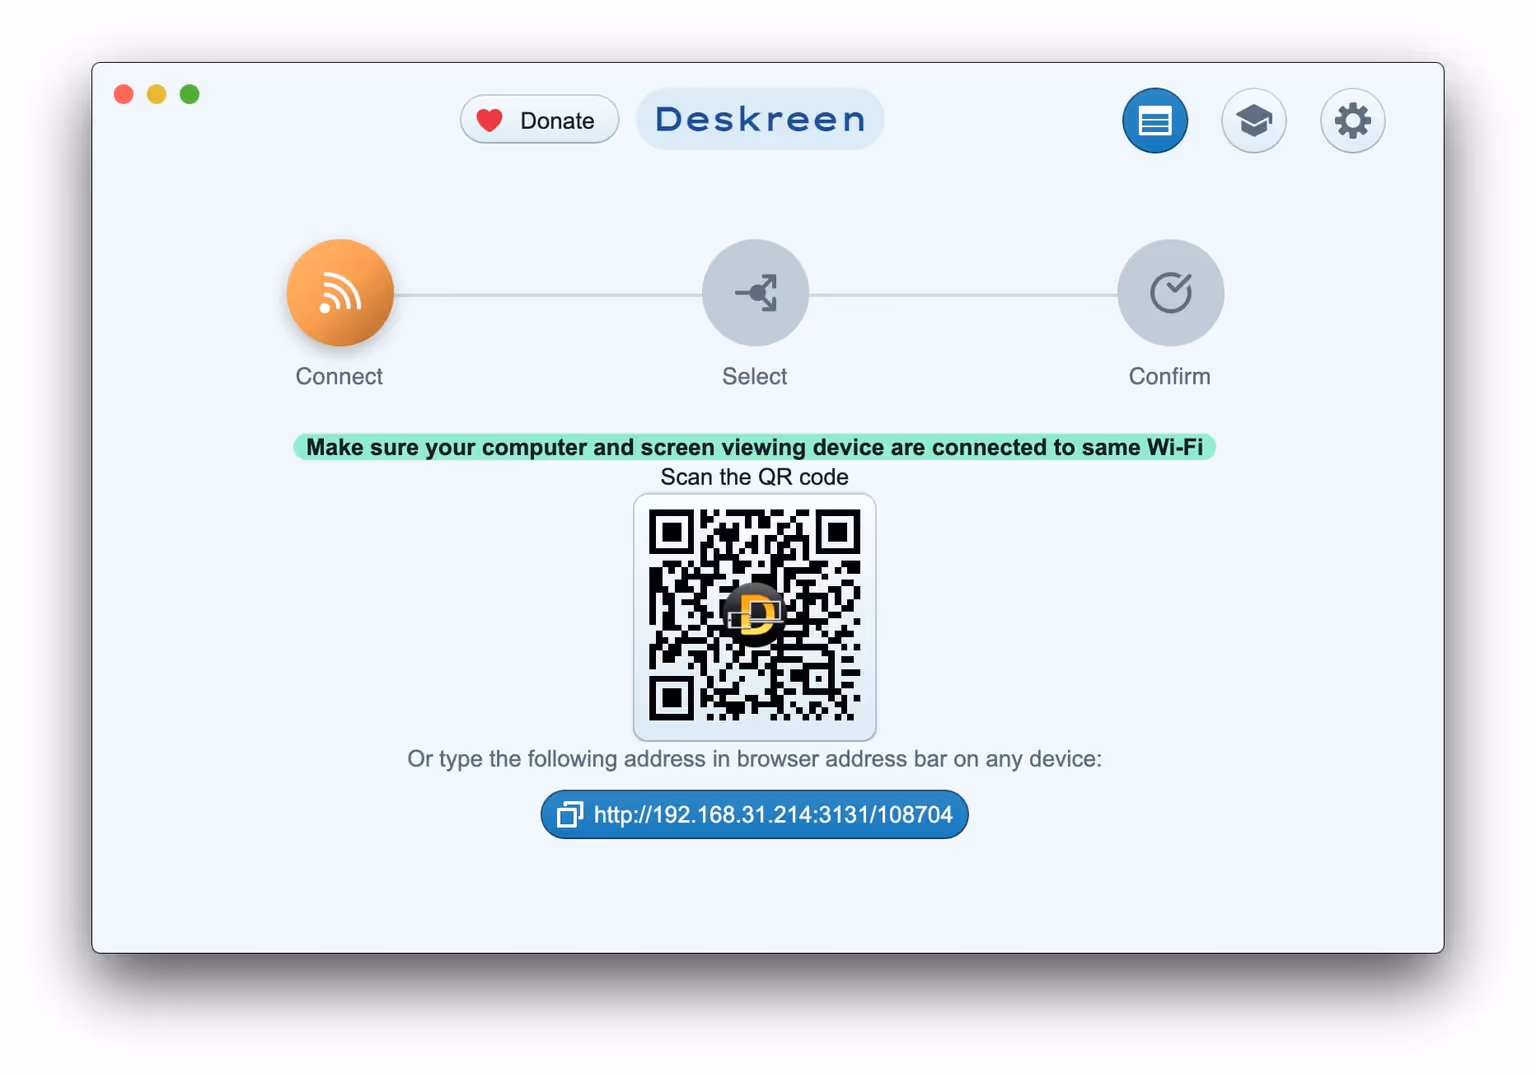
Click on QR code to make it bigger if your camera cant recognize a small a QR code

Step 1-1: Enlarged QR code

If you don't have a camera to scan a QR code, click on blue button below QR code to copy address to clipboard. Then you can share copied address and paste it to web browser address bar to open Deskreen viewer. You can also type the address in blue button manually in browser address bar on any device to open Deskreen Viewer.

Step 1-2: Copy address button

When you follow a link by QR code, or typing it manually in browser address bar, you will see message box like below. The address highlighted in green should match with what you see on your computer Deskreen app and device you try to connect with (eg. phone, tablet). If adresses match, then you can click Allow button. This will lead you to step two.

Step 2: Connection confirmation
2
STEP TWO: SELECT
When you clicked 'Allow' button, you will be asked to choose what screen source you want to share. You will be prompted to select one of two options: Share Entire Screen or Share Application Window. Like in an image below.
Step 2: Screen selection options

STEP TWO (a): Application Window Sharing

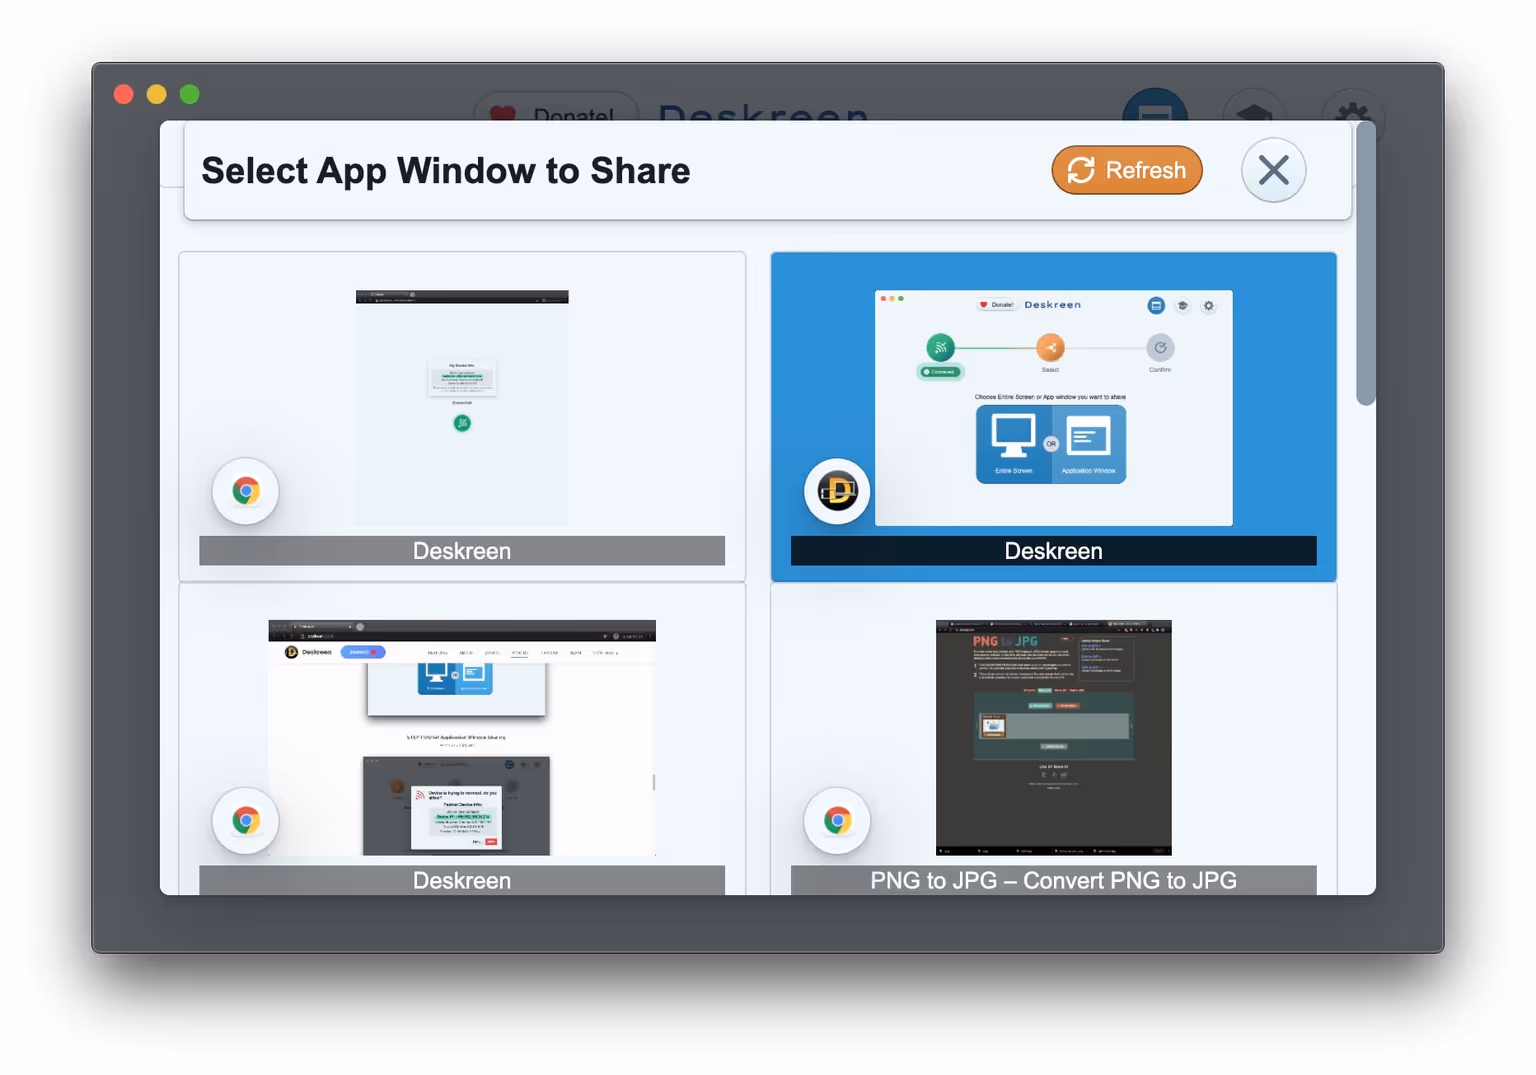
When you click on Application Window Button you can select what app window to share like in image below. Click on app window preview box and you will proceed to step three.

Step 2a: Application window selection

STEP TWO (b): Entire Screen Sharing (Mirror Screen and Second Screen Use Cases)

If you want to share entire screen click on 'Entire Screen' button. You can choose to share entire screen when you need to mirror entire screen or use it as second screen, when Virtual Display Adapter is connected. Click on preview box and you will proceed to step 3.

Step 2b: Entire screen selection
3
STEP THREE: CONFIRM
This is a final step. Here you just double check, to make sure everything as you wanted. If you've changed your mind, you can go back, or even disconnect a device by clicking 'Connected' green button, a connection info menu will open with 'Disconnect' button that you can click to disconnect device.
Step 3: Confirmation screen
DONE!
After all done you will see 'Done!' message, and you can repeat this procedure to connect one more device.
Step 4: Success message

You will be able to view your computer screen in a web browser on other device. You can see example of application window sharing in the image below.

Step 4: Application window sharing example

Additional Features

Connected Devices Panel
By clicking blue 'Connected Devices' button in top bar the panel will open where you will be able to disconnect one or all connected devices. In case of emergency, just quit Deskreen app, and all screen sharing sessions will stop immediately.
Connected Devices Panel
Flip Screen Mode
Here is a demonstration of how Flip Screen Mode works. Useful when using a teleprompter.
Flip Screen Mode demonstration

Requirements and Permisions for Deskreen app

MacOS Permission to allow Deskreen to record screen
Deskreen works via screen recording technology
MacOS Screen Recording Permission
Windows Permission to allow Deskreen to access Local and Public Networks
Windows users need to add 'Private Network Access' for Deskreen on first start or in firewall settings
Firewalls, antivirus etc.
Deskreen is not yet code signed. That means your antivirus will complain when you run it for the first time.